

I think Remix is by far my favorite React framework (sorry, Next.js). There are lots of reasons why I like building web applications with Remix.
Remix offers all the bells and whistles of a mature full-stack JavaScript/React framework. It exposes web APIs, so it doesn't just hide behind abstractions. In other words, by using Remix, it makes you a better developer. (I think)
It handles lots of stuff out of the box:
File-based routing
Progressive enhancement
Error handling
Ways to eliminate jarring loading states
Performance
Loaders and actions
Accessibility
And so much more…
If that’s not enough here is why Kent C. Dodds loves using remix.
Hopefully, by now I have at least piqued your interest. If you are still not interested, oh well, I tried. ¯\_(ツ)_/¯
Routing
To talk about routing in Remix, we have to quickly discuss what routing is and what terms you need to understand before diving in.
Routing is important to any serious web application. Would you use a web application if it only has one page? Where's the fun in that?
Just use this blog post's URL as an example:
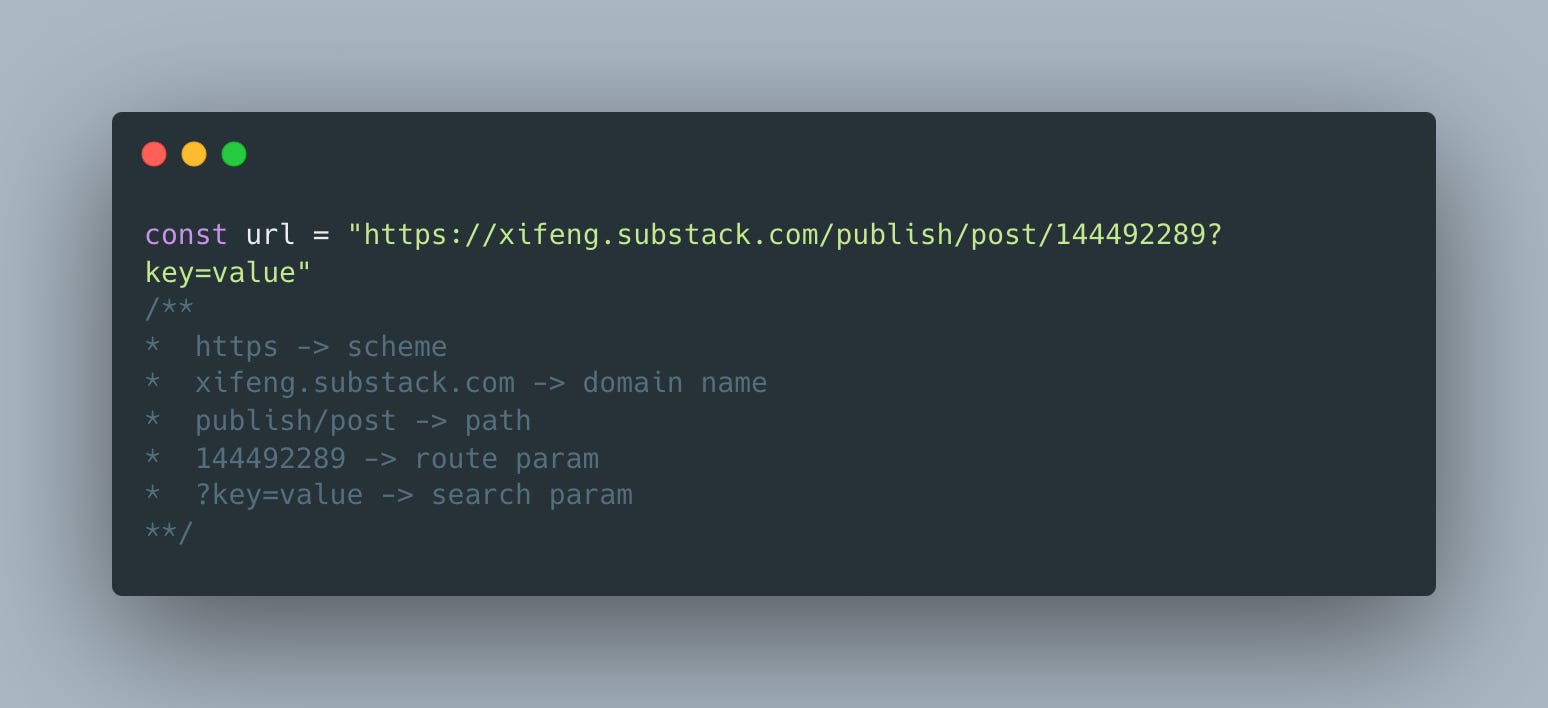
Now that we've got that out of the way, let's talk about how Remix handles routing.
Remix is just like Next.js in that it implements a file-based routing system. What that means is that if you want to create a route, all you have to do is create some folders (following the conventions, of course) and you will have all the routes you need for your application.
I personally like to see an example when learning something new. Let's build a note-taking app together and learn the concept of routing in Remix.
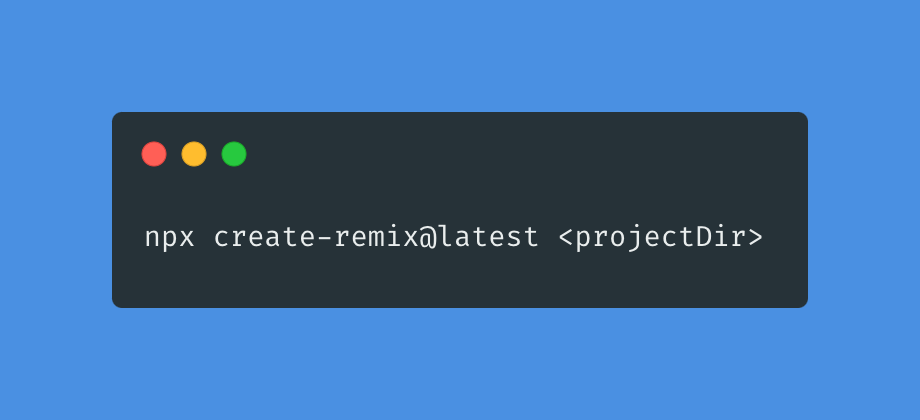
First, let's create a Remix project (we are not gonna use any template for scaffolding our project). See the Remix docs on Quick Start.
Before we develop further, these are the routes I want to create for our note-taking app:
/users
/users/:username
/users/:username/notes
/users/:username/notes/:noteId
When I first started learning about Remix routing, it was confusing, to say the least, trying to understand how to correctly set up routing or what the recommended way to set up routing is. They created a routing convention but also made it configurable. All that is to say that there is more than one way to create routes in Remix. See the Remix docs on Route Configuration.
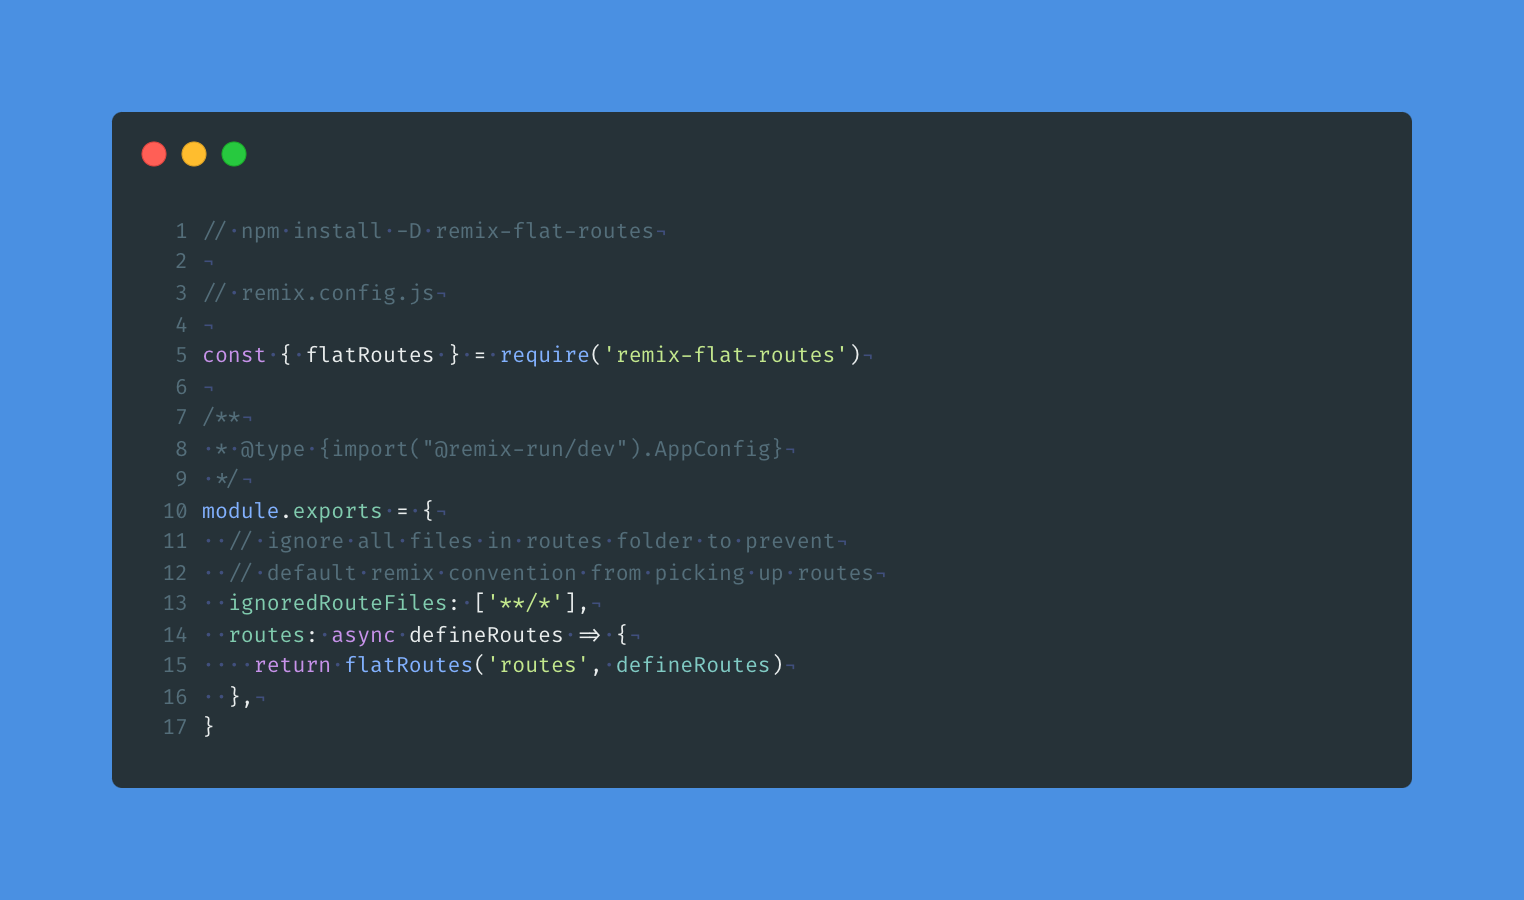
The best way for me to learn was just by building it. The routing convention we are gonna use here is called remix-flat-routes. It's one of the officially recommended routing conventions, so let's go with that.
Here is how you configure it
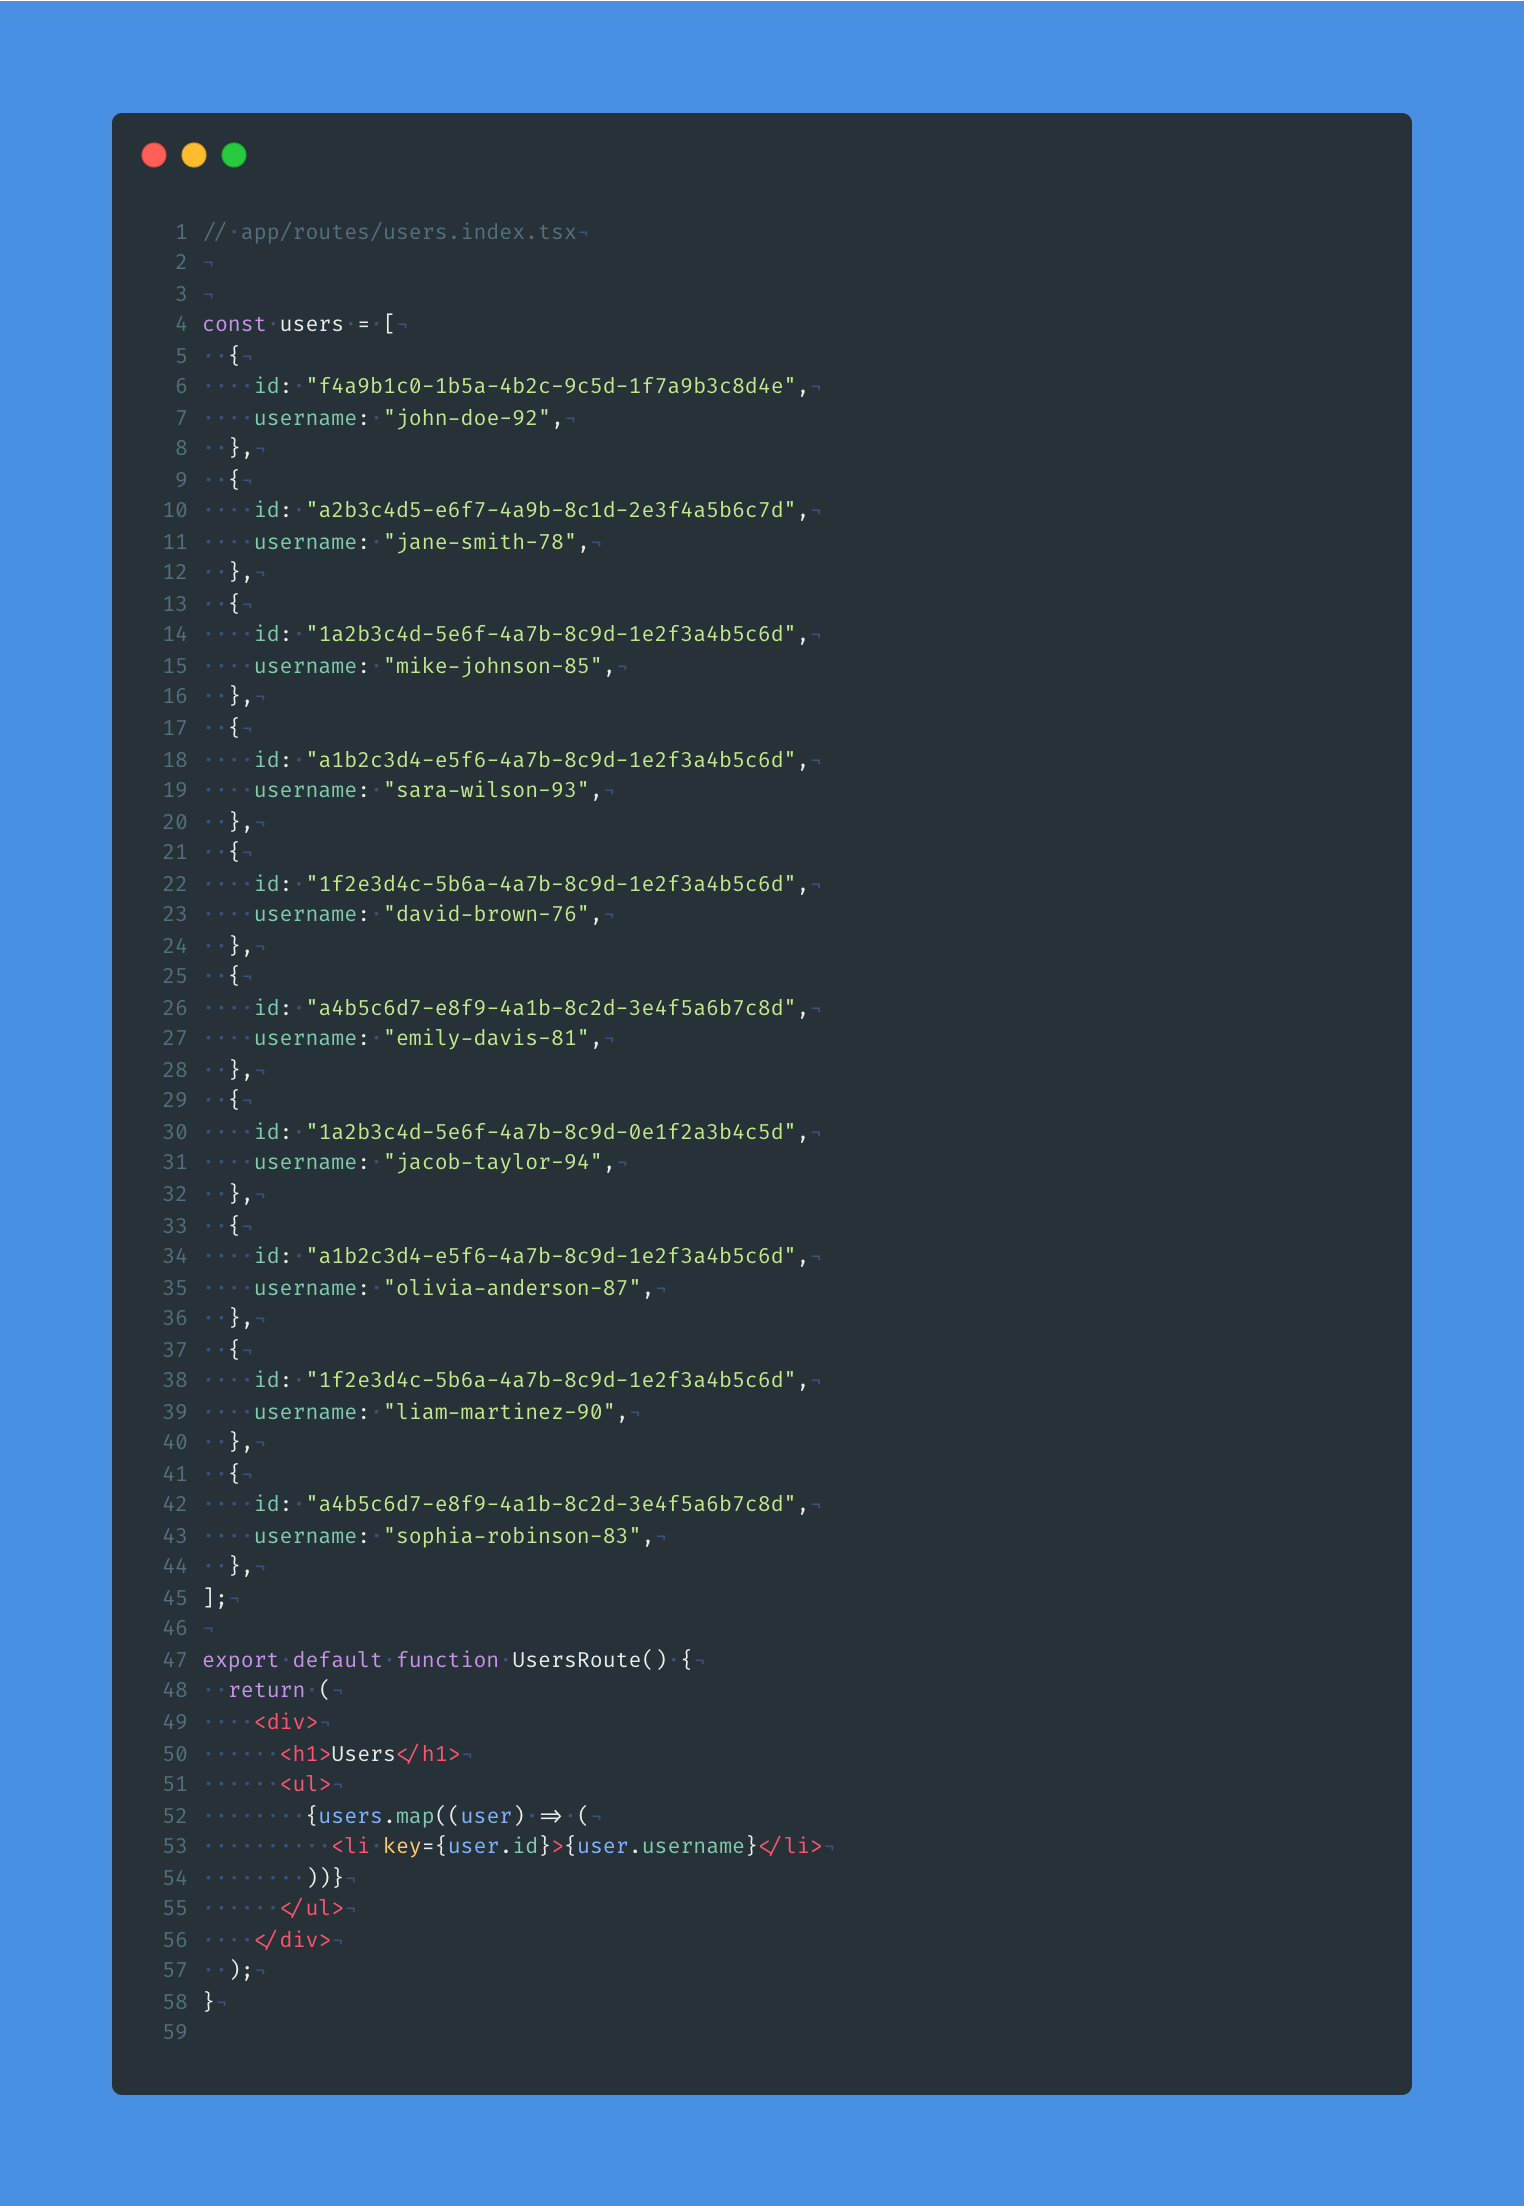
Let's create our first route, /users, in the /app/routes directory.
We're using the route_path.index.tsx convention here, but other options include:
/routes/users+/index.tsx
/routes/users+/_index.tsx
/routes/users+/_index/route.tsx (useful for colocating UI + application logic relevant to the users route)
/routes/users.index.tsx (dot indicates /)
All these are ways to create the /users route.
I know what you are thinking: why so many ways? I guess this is the tradeoff you have to make when using a framework that offers flexibility.
I am gonna stick with the /routes/users+ convention just because we need to create more nested routes.
Next, now that we've created the route to display a list of users, we need to create user’s detail page.
In Remix, for linking or client-side routing, we can use the Link component. Let's update Users.tsx:
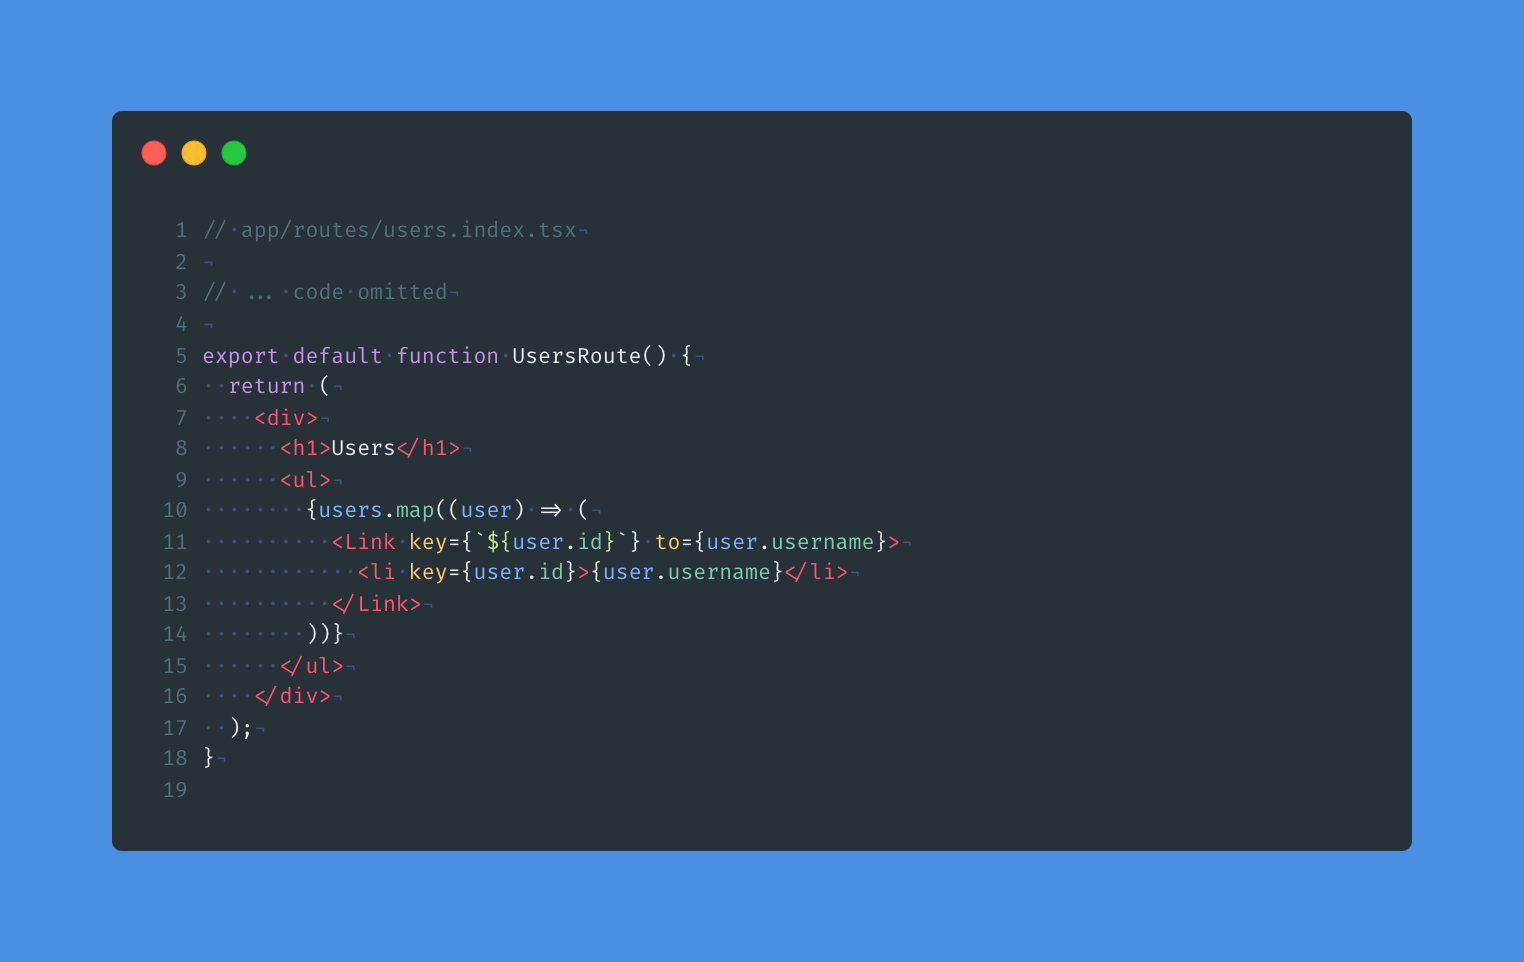
We created a way to link to a user’s detail’s page, let’s create route for /users/:username route.
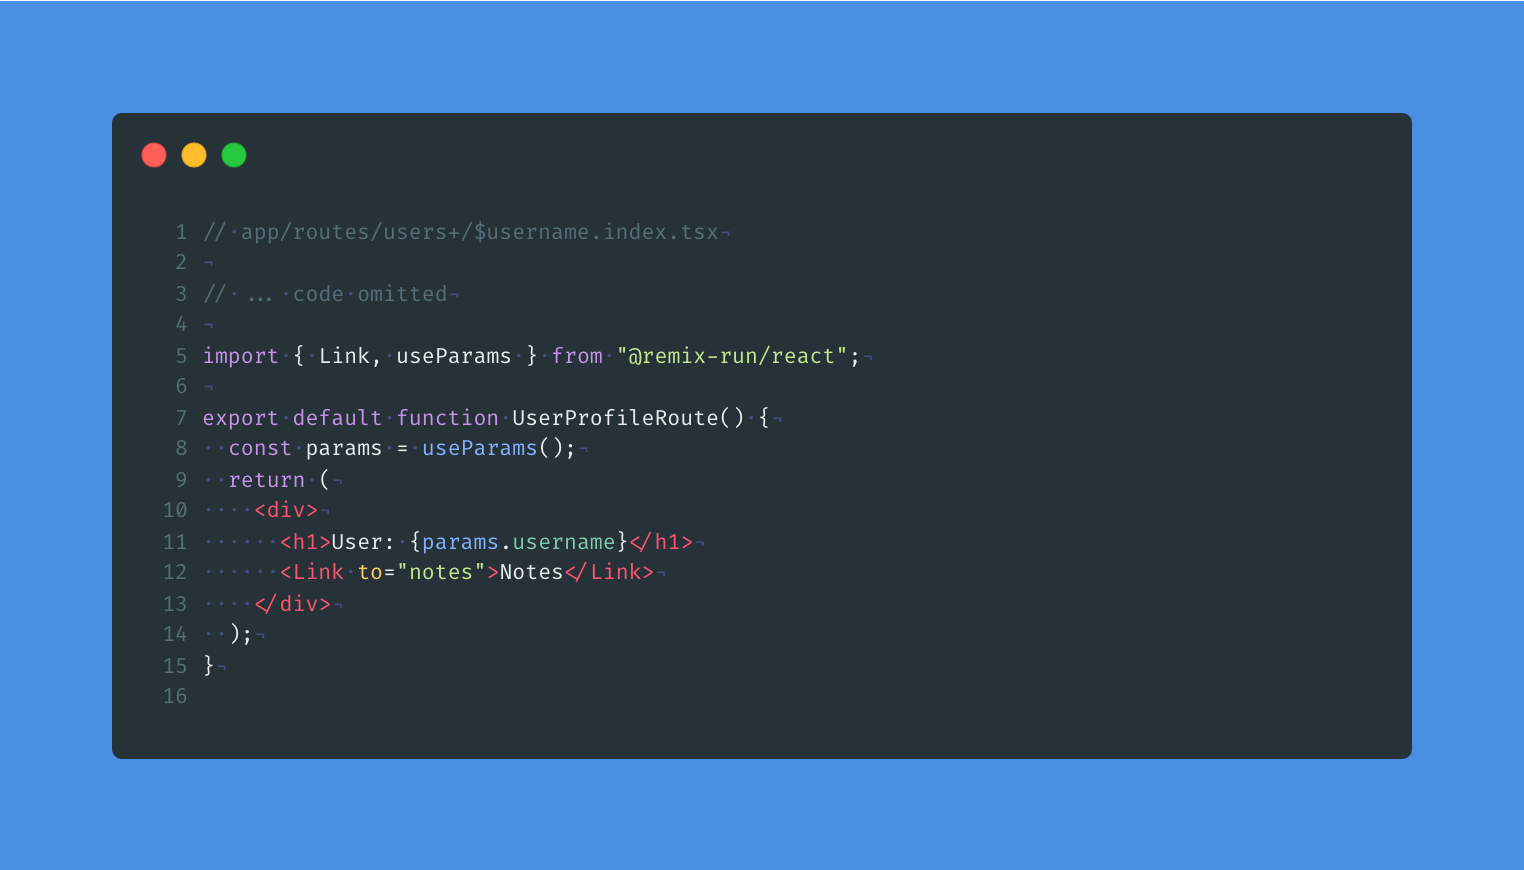
In remix, to access route params or dynamic params, we can use the useParams hook.
Using $ to specify a dynamic route looks weird at first, but after a while you will get used to it (I hope). The rules around routing conventions apply to dynamic routes as well.
Now that we've finished the user's details page, let's move on to creating /users/:username/notes and /users/:username/notes/:noteId. It's pretty similar to how we created /users and /users/:userId, with a minor difference: layout routes.
I want the notes page to have a shared UI layout for /notes and also /notes/:noteId.
This is how you do that

I know there is a lot going on here, so let me explain.
Since we won't be nesting routes further after /notes, we can use the DOT convention instead of a directory for notes-related routes.
In this case, notes.tsx serves as a layout route. Using a layout route is optional and depends on your preference. If you want to share a layout between a parent route and its child routes, a layout route is the way to go.
notes.index.tsx is used to display the content we would have shown if we hadn't created a layout route. It might seem confusing at first, but here's the breakdown:
index.tsx is for the actual content we want to display for the /notes route
notes.tsx is for the shared layout
If this still doesn't make sense, I recommend checking out the official documentation for more clarification.
Finally, notes.$noteId.tsx is used for the /notes/:noteId page, which is the page to view a specific note.
That wraps up Remix Part 1 - Routing.
This post is part of a Remix blog series. If you enjoyed it, consider subscribing to my blog for more upcoming Remix posts.
Until next time, Bye!